This article is for Mac OS X, 10.9.5. We’ll review how to log in to a machine on AWS using a friendly hostname rather than an IP address.
If you have many servers in your care, recalling all the related IP Addresses can be tedious, confusing and error-prone. Keeping a list in a database or spreadsheet is one way to track IP Addresses, but a more efficient method is to keep that list in the hosts file on your machine. Once you set up your hostname, there won’t be anything to look up!
Instead of typing in:
ssh 192.168.10.109 -l myusername -i mypemfile
we’ll be able to type in:
ssh myservername -l myusername -i mypemfile
If you’ve adopted naming conventions, logging in is quite easy.
Four Easy Steps Overview
- Check to see if you have a file called /etc/hosts.
- If not, create a symbolic link to /private/etc/hosts.
- Edit the file using pico adding the desired entry.
- Log in to the target machine.
Four Easy Steps with Detail
- From any directory, type ls -l /etc/hosts. If the terminal responds with “no such file or directory“, we’ll create the link to /private/etc/hosts in the next step.
- To add the symbolic link, use the ln command with the -s option (the -s option specifies that the link is symbolic). This will create a link from /etc/hosts to the actual file /private/etc/hosts and make the hosts file generally available wherever you are in terminal.
ln -s /private/etc/hosts /etc/hosts
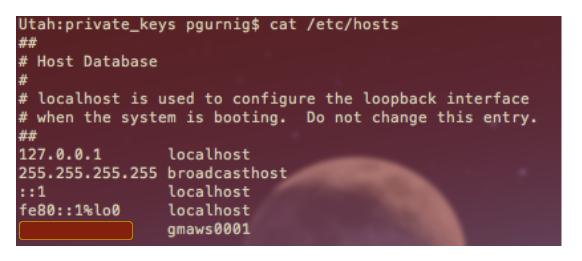
- Now, edit /etc/hosts using nano, pico or your favorite text editor. Add an entry similar to what is shown below. (Note that the ip address is hidden in the example.) In this case, we’re mapping the IP to a standard machine abbreviation used to represent the company (gwa), the type of server — ws (webserver), and the number of the server.
- At the point, you should be able to log in to your target machine using the hostname specified in the hosts file. The first time you connect, you’ll see a message similar to the following.

That’s it!
